Visualizzazione post con etichetta Linux. Mostra tutti i post

martedì 26 gennaio 2016

Convert a Linux ESXi Virtual Machine to Xenserver

Since I had to migrate my hypervisor from vmware ESXi to Citrix Xenserver 6.5, I had to convert my Centos Linux 6.x Virtual Machines.
The main difference in Xenserver is that the Linux kernel is paravirtualized.

Tools for the trade:
- vmware vSphere Client
- Xencenter
- Very little Linux terminal skills :)

STEP 1

Optional: take a snapshot

Drop into vSphere Client and take a snapshot.

It's safe to take a snapshot before messing with vms :)
It is safe to take a snapshot prior to daamge your work

STEP 2

Uninstall vmware Tools


Connect to virtual machine console and type as root:

# rpm -e --nodeps $( rpm -qa | grep vmware-tools)


STEP 3

Export the Virtual Machine into an OVF Package.


Shutdown your VM then in VSphere Client Select your VM and click on File->Export->Export OVF Template
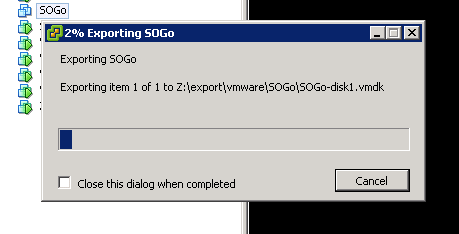
vm export
Export your VM - now you can go take some coffee

STEP 4

Import The VM in Xenserver


Now move to Xencenter, right click on the Pool then select Import...

Time to import your VM - now you can go take another coffee

Follow the instructions on wizard


STEP 5

Configure VM for PV.

Power on your VM and login to console as root.

Remove the stock kernel and install the xen-aware kernel by typing

# yum remove kernel
# yum install kernel-xen


Edit the bootloader, add to "kernel=" line

console=hvc0


Then shutdown your VM.

Now open a console to your Xenserver host and change boot policy from HVM to PV:

xe vm-list name-label=[NAME-OF-YOUR-VM]
uuid ( RO)           : [UUID-OF-YOUR_VM]
     name-label ( RW): SOGo
    power-state ( RO): halted

xe vm-param-set uuid=[UUID-OF-YOUR_VM] HVM-boot-policy="" PV-bootloader=pygrub PV-args="graphical utf-8"

xe vm-disk-list uuid=[UUID-OF-YOUR_VM]
Disk 0 VBD:
uuid ( RO)             : [UUID-OF-VBD]
    vm-name-label ( RO): SOGo
       userdevice ( RW): 0
[...]

xe vbd-param-set uuid=[UUID-OF-VBD] bootable=true

Then Power on your VM and Install XenTools.

Source: CTX121875

venerdì 9 marzo 2012

Esportare le unità a nastro via iSCSI con SCST, autoloader compresi!

Nelle moderne sale server ci piace virtualizzare tutto. A volte anche il server che gestisce i backup. Quando facciamo backup su disco è facile, basta un NAS, ma quando dobbiamo farlo su nastro?
Va bene che vmware supporta il pass-through dei dispositivi SCSI, ma dato che ho un paio di storage iSCSI realizzati con Linux, perché non usarli anche per rendere disponibili nastri e autoloader, oltre che ai dischi?

Vediamo come farlo con linux, il target generico SCST e una unità Dell Powervault 124T.

( Do per scontato che abbiate già un'installazione linux con SCST funzionante, altrimenti in rete ci sono diversi howto da seguire per arrivare allo scopo. )

Per prima cosa colleghiamo e accendiamo la nostra libreria, se è esterna.
Poi controlliamo che il sistema la rilevi correttamente, con il comando lsscsi:

brick01# lsscsi 
[1:0:0:0] cd/dvd PLDS DVD+-RW DS-8W2S 1D11 /dev/sr0
[2:0:0:0] disk Generic STORAGE DEVICE 0207 /dev/sda
[3:0:32:0] enclosu DP BACKPLANE 1.05 -
[3:2:0:0] disk DELL PERC 6/i 1.21 /dev/sdb
[4:0:0:0] tape IBM ULTRIUM-TD4 97F0 -


Le librerie normalmente sono costituite da due LUN, la LUN0 che punta al nastro e la LUN1 che punta al media changer. Nel mio caso quindi (e probabilmente anche nel vostro) manca qualcosa ...

Dal momento che lo SCSI ID dell'unità a nastro è 4:0:0:0, rappresentato nella forma H:C:I:L (Host:Channel-ID-Lun), il nostro media changer dovrebbe corrispondere allo SCSI ID 4:0:0:1.
Per cui diciamo al sottosistema SCSI di linux di andare a interrogare anche l'ID del media changer.

brick01#echo "scsi add-single-device 4:0:0:1" > /proc/scsi/scsi

Ora l'unità dovrebbe fare un po' di rumori. Almeno è quello che ha fatto la mia!
Verifichiamo con lsscsi che il comando sia andato a buon fine:

brick01# lsscsi
[1:0:0:0] cd/dvd PLDS DVD+-RW DS-8W2S 1D11 /dev/sr0
[2:0:0:0] disk Generic STORAGE DEVICE 0207 /dev/sda
[3:0:32:0] enclosu DP BACKPLANE 1.05 -
[3:2:0:0] disk DELL PERC 6/i 1.21 /dev/sdb
[4:0:0:0] tape IBM ULTRIUM-TD4 97F0 -
[4:0:0:1] mediumx DELL PV-124T 0075 -


Ed ecco il apparire il changer!

Ora possiamo procedere con la configurazione di SCST.
Attiviamo prima gli handler di nastro e changer:

brick01#modprobe scst_tape
brick01#modprobe scst_changer


Per chi usa scstadmin, creiamo i due device in pass-through, creiamo un target iscsi e abilitiamolo:


brick01# scstadmin -open_dev 4:0:0:0 -handler dev_tape_perf
brick01# scstadmin -open_dev 4:0:0:1 -handler dev_changer
brick01# scstadmin -add_target iqn.2012-03.com.brick:vsan.tape -driver iscsi
brick01# scstadmin -add_lun 0 -target iqn.2012-03.com.brick:vsan.tape -device 4:0:0:0 -driver iscsi
brick01# scstadmin -add_lun 1 -target iqn.2012-03.com.brick:vsan.tape -device 4:0:0:1 -driver iscsi
brick01# scstadmin -enable_target iqn.2012-03.com.brick:vsan.tape -driver iscsi


Per chi vuole agire direttamente sul file di configurazione, invece:

#File /etc/scst.conf

HANDLER dev_changer {
        DEVICE 4:0:0:1
}

HANDLER dev_tape_perf {
        DEVICE 4:0:0:0
}

TARGET_DRIVER iscsi {
        enabled 1

        TARGET iqn.2012-03.com.brick:vsan.tape {
                enabled 1
                rel_tgt_id 1

                LUN 0 4:0:0:0
                LUN 1 4:0:0:1
        }
}


Poi andate sul vostro initiator preferito (io ho testato il tutto con Microsoft iSCSI Initiator e Symantec Backup Exec), collegate il target, e buon backup!